Optimising the LCP Metric
 Radek ŠírUpdated 2/7/20268 minutes reading
Let us explore the challenges you might face with the Largest Contentful Paint (LCP) metric and how to optimise it effectively.
We've prepared several tips for optimising the LCP metric, drawing from our speed consultancy. Here, we'll demonstrate the use of technologies like Priority Hints, preload, or native lazy loading.
If you're keen to learn more, read on or watch our webinar recording:
YouTube: Practical LCP Speed Metric Optimisation
Before you start, also take a look at how to correctly identify the LCP element. This is crucial for further optimisation.
Priority Hints (increase priority directly on the element)
If the LCP element is an image, you can change its download priority using Priority Hints. You increase the priority by adding the fetchpriority="high" attribute to the <img> tag. This ensures that the image source starts downloading with the highest priority, ensuring the fastest rendering of this element.
For other images on the page, add the loading="lazy" attribute to the <img> tag. This tells the browser that you want this resource to be downloaded and rendered only when the user scrolls to it.
Don’t forget about images from areas edited via WYSIWYG, which web editors insert into pages.
Also, consider carousels and similar components with multiple images. If a carousel is the LCP element on the page, add the fetchpriority="high" attribute to the first image and the loading="lazy" attribute to all other images.
<ul class="carousel">
	<!-- First image in the carousel,
	with increased loading priority: -->
	<li><img src="image1.webp" fetchpriority="high" alt="" /></li>

	<!-- Other images in the carousel,
	with low loading priority: -->
	<li><img src="image2.webp" loading="lazy" alt="" /></li>
	<li><img src="image3.webp" loading="lazy" alt="" /></li>
</ul>
Support is quite broad. The fetchpriority attribute works in all modern browsers except Firefox. More information can be found on web.dev.
Preload (increase priority in the document head)
Similar to Priority Hints is the <preload> tag. Using the <preload> tag, you can tell the browser to start downloading a resource as soon as possible. Preload is useful, for example, for preloading those files with web fonts that are important for the first rendering of the visible part of the page:
<link rel="preload" href="/font400.woff2" as="font" type="font/woff2" crossorigin="anonymous" />
<link rel="preload" href="/font500.woff2" as="font" type="font/woff2" crossorigin="anonymous" />
<link rel="preload" href="/font600.woff2" as="font" type="font/woff2" crossorigin="anonymous" />
Using <preload>, you can preload web fonts, JavaScript files, or images.
The advantage of the <preload> tag is its functionality in all browsers.
If you want to use preload on images with srcset, it's necessary to define the sources in the exact order for all widths and all source images. In this case, using the fetchpriority="high" attribute directly on the <img> tag is much simpler, allowing the browser to decide which source to download with priority.
Another disadvantage is that <preload> must be placed in the <head> as high as possible. Place the preload for the font at the beginning of the <head>, before the <link> that declares the path to the CSS files with styles.
More information on how to properly prepare <preload> can be found on MDN.
Native Lazy Loading
Using native "lazyload" is now standard, as it offers full support across all modern browsers. Use lazy loading on all <iframe> and <img> elements that are not in the first viewport. This ensures that the browser can effectively manage the loading of these elements.
When using JavaScript lazy loading, where <img> tags do not have the src attribute set, the browser is unaware of the source files.
<img src="image1.webp" loading="lazy" alt="" />
WebP Images
Prepare images in the modern WebP format and use them in all parts of your website, including illustrative images. This format allows for significant space savings compared to JPG or PNG formats, maintains quality, and improves page loading speed.
Don't forget to optimise images from WYSIWYG sections, prepared by web editors.
Manually fine-tune the compression of illustrative images using tools like Squoosh.
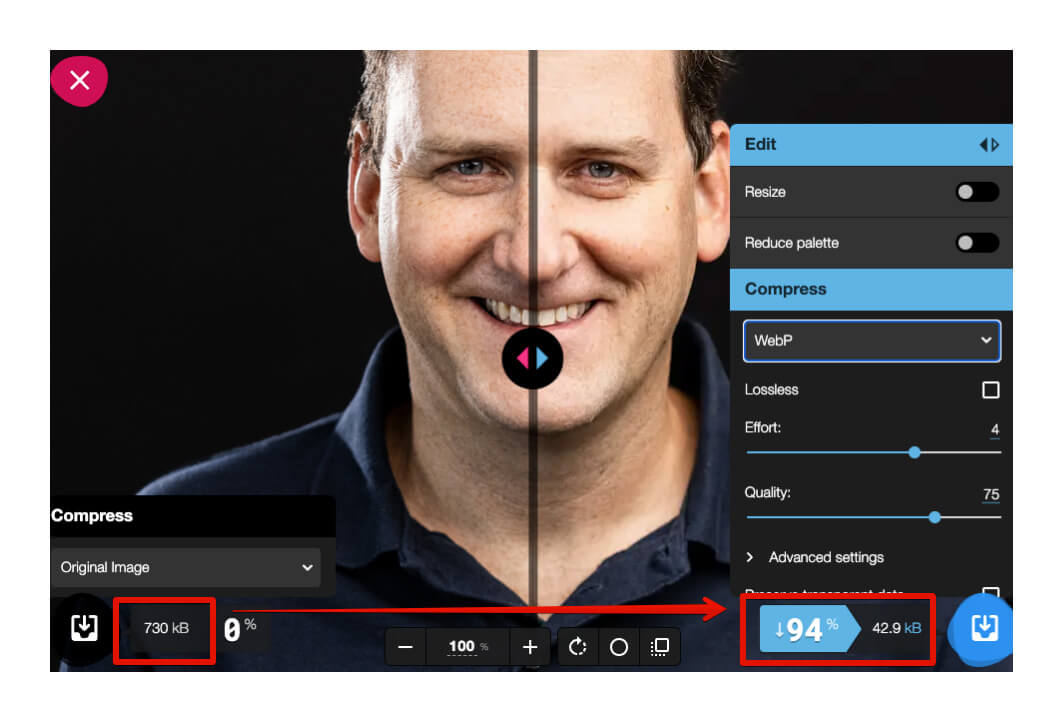 The Squoosh tool allows you to experiment with different compression variants.
Tip: At the time of this article's publication, Google is introducing the Jpegli library, which can compress images in JPG format up to 35% better than previous libraries and can compete in size with the WebP format.
Optimise Web Fonts
Before implementing web fonts on your site, check their size and consider using subsetting to optimise the final size.
If possible, always prefer locally storing fonts on your server, which can significantly improve page loading speeds. To generate local files for Google Fonts, you can use tools like Google Font Helper.
Always use the WOFF2 format. Other formats are no longer necessary. WOFF2 is widely supported in all modern browsers.
Before deploying font files, check their content using tools like Wakamai Fondue to understand the number of characters, axes, and other information for optimal font selection and configuration on your site.
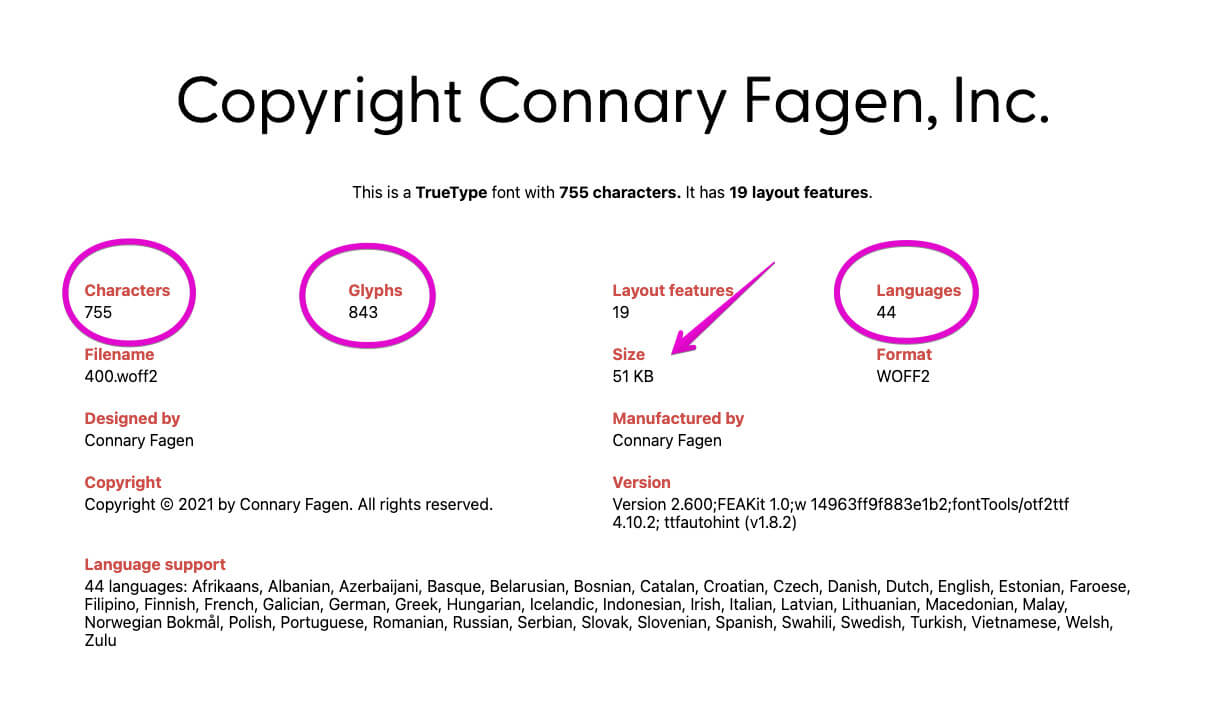 Before optimisation, the font file size is 51 kB. Source: Wakamai Fondue.
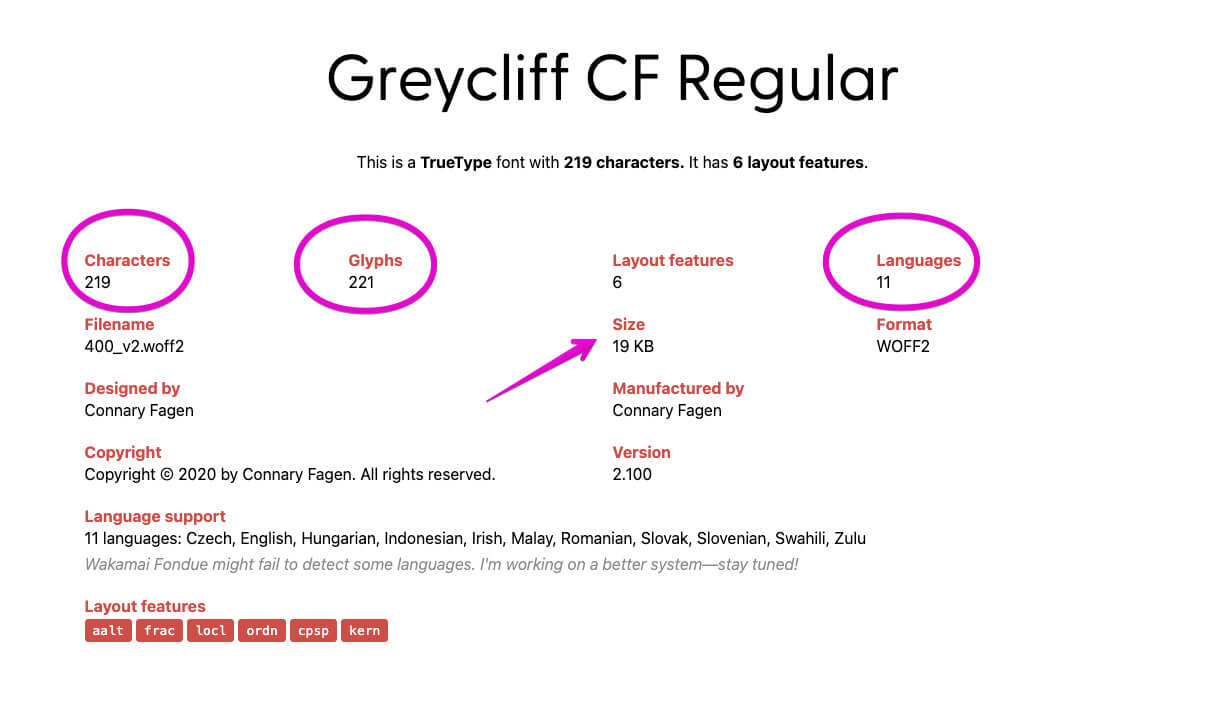 After optimisation, the font file size is 19 kB. Source: Wakamai Fondue.
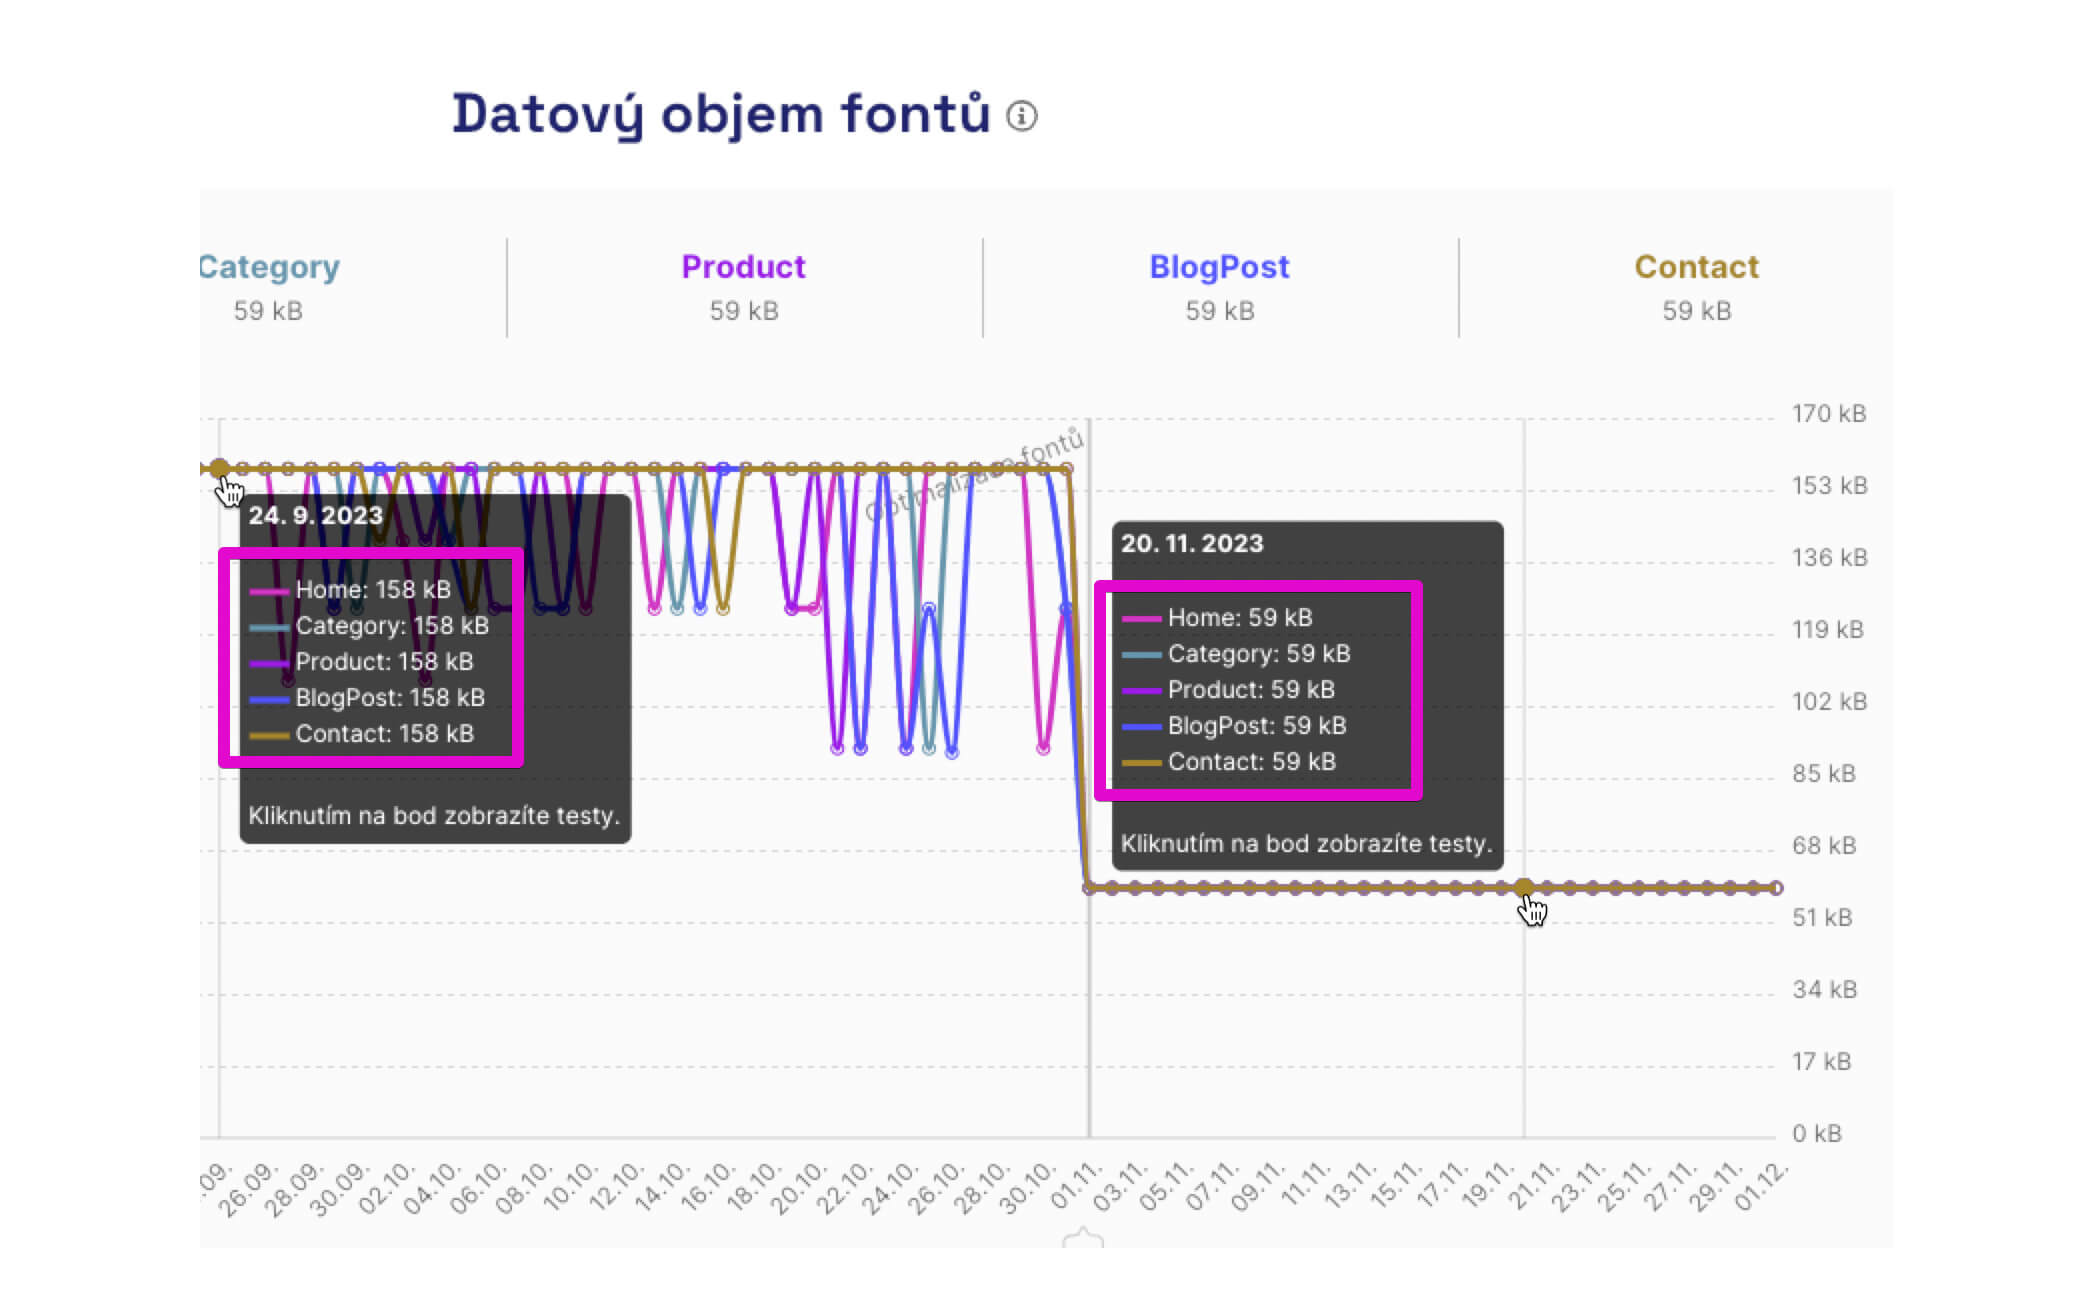 After optimising all font files, approximately 100 kB was saved during data transfer. Source: PageSpeed Monitoring.
JS Files and Inline Scripts
Always place JavaScript files in the footer before the </body> tag or in the header before the </head> tag on your pages. Ideally, use the defer attribute, which allows JS files to be processed only after the browser completes parsing the HTML code.
<script src="app.js" defer></script>
Avoid embedding "ad-hoc" scripts directly into the page code. For instance, the maps.google.com/maps/api/js file, for handling maps on the page, should not be embedded in the middle of the HTML document. Incorrectly placed scripts can block the rendering of the entire page.
Proper Brotli or Gzip Compression
When optimising your site, it's important to check the compression settings for text files CSS, JS, SVG, and ICO. Ensure that Gzip or Brotli compression is enabled on the server.
- For Gzip compression, we recommend setting at least level 7, ideally 9 - 10. For Brotli, a compression level of 6 - 7.
- Proper settings ensure effective file size reduction and faster page loading for users.
- Also, check that compression is correctly set for SVG files, which is often overlooked.
- Conversely, compression should not be enabled for the WebP image format because these files are already compressed, and compression could increase their size.
To check compression settings, you can use the Gzip and Brotli Compression Level Estimator.
Further LCP Optimisation Options
- Use BF cache for instant page loading from browsing history.
- Add Speculation Rules to the site, for instant page loading via background rendering.
- Be careful not to let your LCP "fall" into the cookie consent bar, which may load later.
- Split CSS into smaller files.
- Organise your
<head>properly.
What to Conclude About LCP Optimisation?
Optimising the LCP metric is crucial for achieving fast and user-friendly websites. Proper implementation of techniques such as those mentioned in the article can help you.
Monitoring LCP and speed in general on a daily basis and analysing newly deployed code are key to maintaining high web performance.
In our PLUS tester, you can use daily monitoring. For selected URLs, we track and store CrUX data from Google and perform synthetic measurements using Lighthouse.
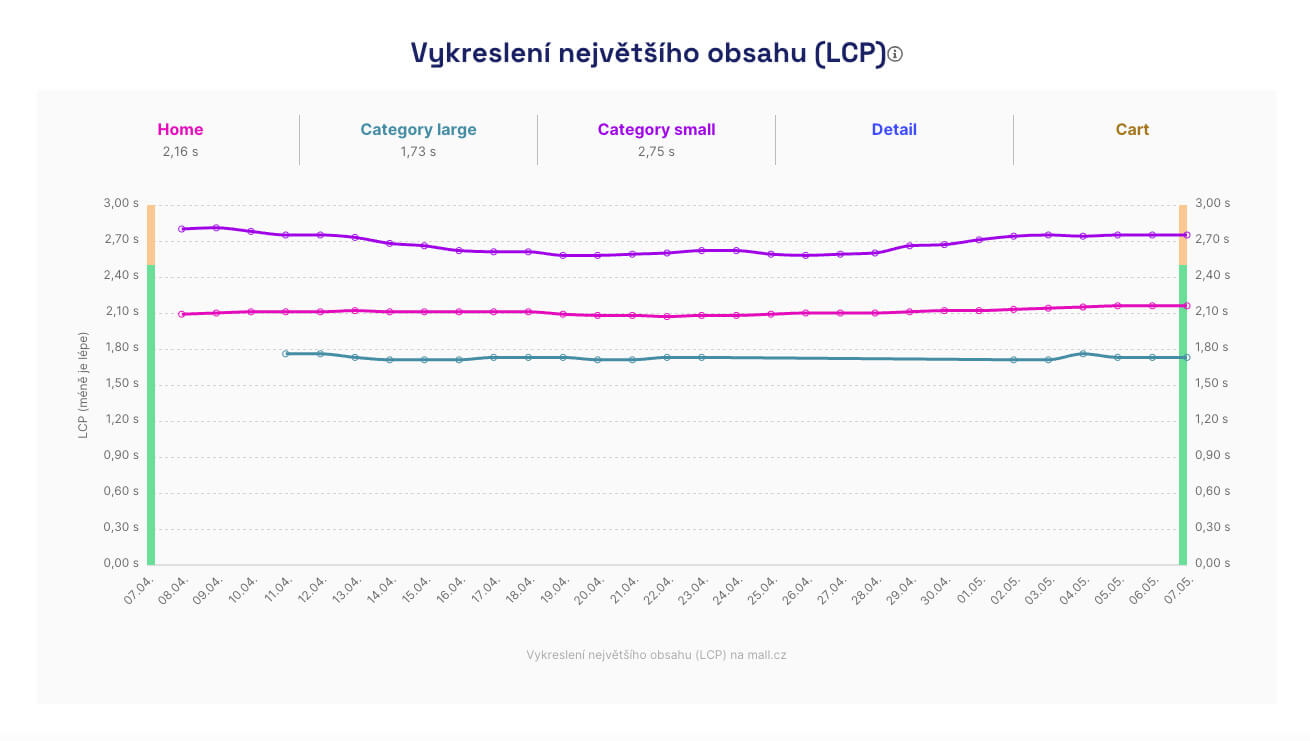 Display of CrUX data from Google for URLs we monitor.
Using the "Watchdog" feature, we then send performance metric degradation outputs to Slack or MS Teams.
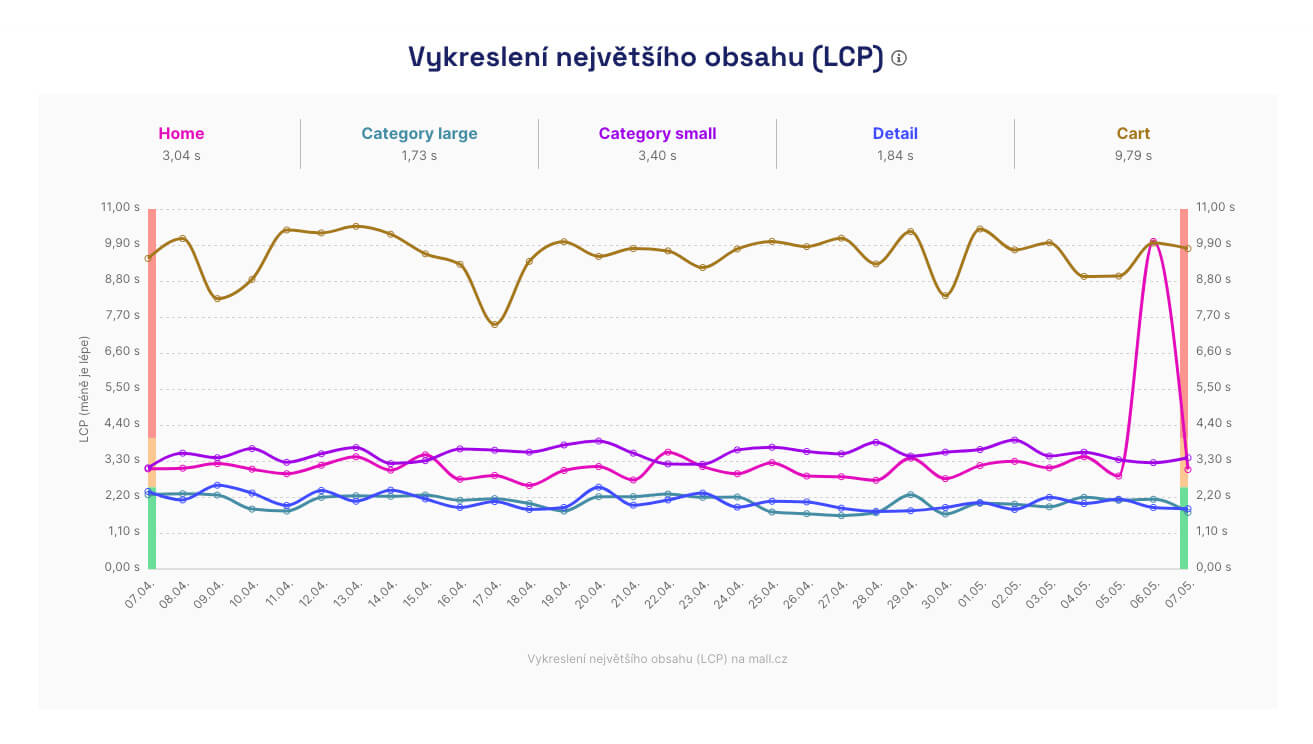 Degradation of the LCP metric in one of the automated synthetic tests in the pagespeed.one tool.
In addition to general recommendations, today in the Domain Report, we also have detailed data from the CrUX API. You will not only see whether your LCP is caused by an image or a text element, but also precisely which part of image loading adds the most delay – server response, downloading itself, or rendering. This allows for much more precise LCP optimisation, and results come faster.
We cover the topic of Core Web Vitals optimisation in full breadth, read our other texts: